What you will learn
- Integrate the Metaplex JS in a React Native project.
- Use an MWA Identity Signer with Metaplex.
- How to read image files from the OS file system.
- How to upload image and metadata files to IPFS, through NFT.storage.
- Create and mint a Metaplex NFT on-chain.
Prerequisites
- Complete prerequisite setup for a ready dev environment.
- An Android device/emulator to build and launch a React Native app
- An MWA-compatible wallet installed on the same device/emulator.
- Basic understanding of MWA.
Project Setup
1. Initialize Scaffold
This tutorial builds off the dApp Scaffold template. This template comes setup with the essential packages like MWA and web3.js. Initialize the scaffold using the following command:NOTEThe
--npm flag is only necessary if you’re using newer versions of Yarn (Yarn 2 or Yarn 3).
After running the command, you can simply delete the package-lock.json generated and continue using
Yarn.2. Install Metaplex JS SDK
The next step is to install the@metaplex-foundation/js package. This is the Metaplex JS SDK that provides
a developer friendly API to interact with onchain programs.
Carefully follow the Metaplex installation steps
here to make sure you install the package along with all the necessary polyfill libraries.
3. Install dependencies
In addition to the Metaplex JS SDK, the app will use several other libraries that handle other usecases, like file reading, IPFS, and others. Some of these are opinionated, so feel free to swap out a library with one of your choice.A brief overview of each dependency:
A brief overview of each dependency:
rn-fetch-blob: A React Native file system reader for converting photos to bytes.react-native-image-picker: Provides a convenient Photo selector UI.react-native-config:Used to store and expose the NFT.storage API key to Javascript.multiformats: A low-level JS library that provides an API/interface to compute CIDs in IPFS format.
4. Launch the app
How does minting work?
The end to end procedure of minting a photo NFT roughly follows these steps:1
Select a photo and upload it to a storage provider.
2
Upload a JSON object containing metadata that conforms to the Metaplex NFT
Standard,
to a storage provider.
3
Submit a transaction to the network that creates your NFT on chain.
Uploading to IPFS with NFT.storage
In this tutorial, we choose IPFS, a decentralized storage provider, to host the selected photo and the metadata object. We’ll also be using NFT.storage to help upload directly to IPFS, through their HTTP API. You can sign up for a free API key on their website.Selecting the photo
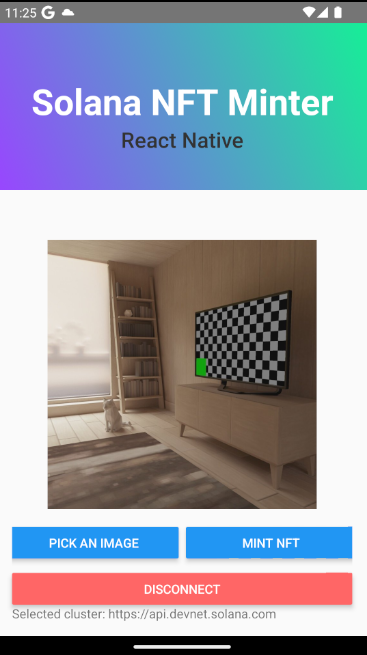
You need to select an existing photo from our gallery. To present a picker UI and retrieve the file path, uselaunchImageLibrary from the react-native-image-picker library.
INFOIn the example app, this is done within the
NftMinter component where handleSelectImage is called on a button press.We save the image path as state, to be used in the next step.Upload the photo
Now that we have the image path, we need to upload the raw bytes of the file to IPFS, using the NFT.storage/upload endpoint.
The steps:
1
Use the
rn-fetch-blob library to read the image file into a Base 64
string.2
Convert to raw bytes by decoding the Base64 string with
Buffer.3
Use
fetch to send a request containing the image bytes to the upload
endpoint.INFOIn the example app, this is handled in a separate helper function
uploadToIPFS, which is called
later within the larger the mintNft function.imageData.value.cid will contain a valid CID (Content Identifier). This is a string that
uniquely identifies your uploaded asset.
You can view your uploaded asset on an IPFS gateway by passing in the CID in the URL (e.g: https://ipfs.io/ipfs/<cid>).
View an example of an uploaded photo on ipfs.io.
Uploading the metadata
Next, we need to construct a metadata object that conforms to the Metaplex NFT Standard, then upload it to the same/upload endpoint.
Metadata fields:
- Name: The name of the NFT.
- Description: A description of the NFT.
- Image: A URL that hosts the photo. In this case, we use an
ipfs.ioURL with the CID of the uploaded photo.
INFOIn the example app, the metadata upload step is also handled within the
uploadToIPFS function.There is a slight difference that should be noted. The image field uses a precomputed CID for the photo, rather than waiting for the photo upload to finish.
This is an optimization that is explained in the next section.metadataData.value.cid will now contain a CID that points to a JSON object representing the NFT metadata. View an example of an uploaded metadata object.
To recap, we now have two CIDs that are viewable on IPFS. First, the CID of our uploaded photo, and second, the CID of
JSON Metadata (which has a reference to the photo CID in the image field).
Precomputing the CID
You may notice in the example app, that during the upload step inuploadToIPFS
we’re able to precompute the CID of the photo asset before actually uploading it to IPFS. This is an optimization that allows us to
construct and upload the metadata object, without waiting for the photo upload to complete and return the CID.
We take advantage of this by uploading both the photo and metadata asynchronously.
getCid function.
Minting the NFT
At this point we have completed the IPFS uploading steps and all that is left is to mint the NFT on chain. To do so, we’ll use the Metaplex JS SDK.Create a Metaplex Instance
To interact with Metaplex onchain programs, instantiate aMetaplex instance provided by the SDK.
Follow this section in the Metaplex guide, to create an MWA Identity Signer plugin. We’ll need
this so that the Metaplex instance will be able to request wallet signing through MWA.
INFOIn the example app, this is handled in two files:
mwaPlugin: A helper file that installs a MetaplexPlugin using MWA as an identity signer.useMetaplex: A React hook that vends a Metaplex instance with the mobileWalletAdapterIdentity installed.Metaplex instance with the useMetaplex hook.
Create the NFT
With themetaplex instance, we can now access the nfts() module that provides a collection of functions that
make it simple to interact with on chain programs and submit transactions.
To mint an NFT, call the create function which takes in a JSON object corresponding to the Token Metadata Standard.
This will prompt the user to sign a transaction using MWA, then submit the transaction to the specified RPC.
INFOIn the example app, this step happens at the end of
mintNft.
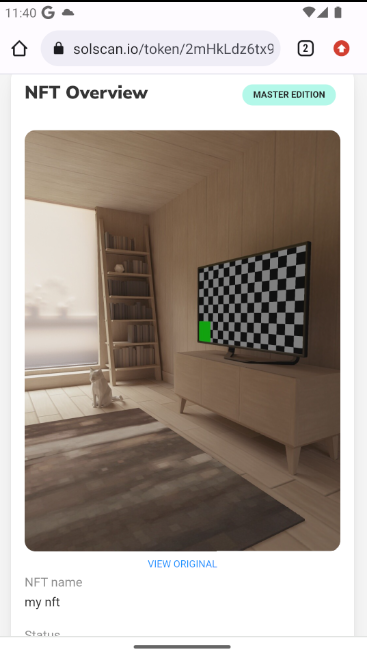
We return the NFT address and present a clickable explorer link.nft.address.toBase58().